
Preload Settings
A cached file is typically generated after a user initially visits a page. This creates a delay for the very first user who views it. The preload allows you to create the cache of all the content periodically, which helps much in improving future page loads.
1. Methods
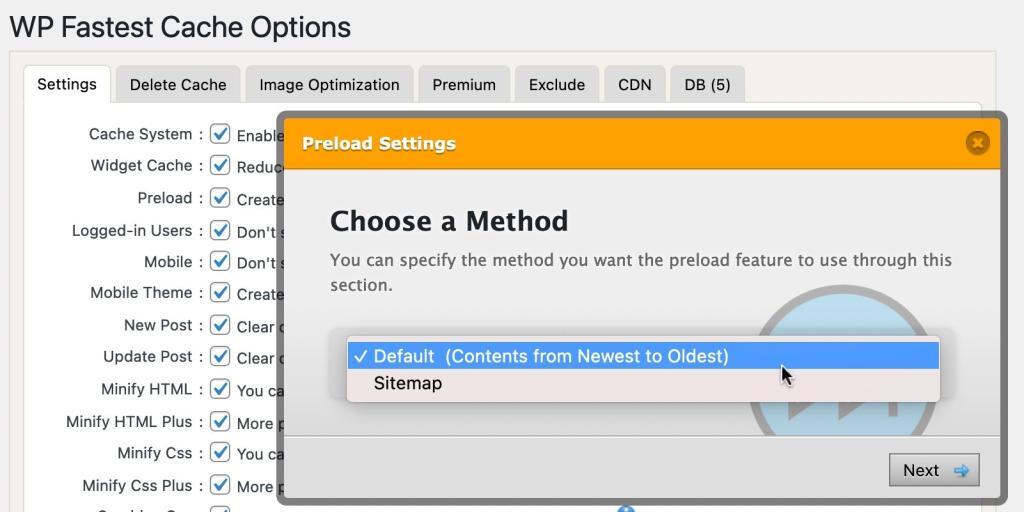
There are two options which are Default and Sitemap on the method panel. If you choose the “default” option, the contents are preloaded from newest to oldest. If you choose the “sitemap” option, the urls are preloaded from the first line to the last line.
2. How Does It Work?
The preload feature starts to work after clearing cache. When the Preload feature calls the urls, the cache of urls are created automatically. When all the pages are cached, the preload stops working. When the cache is clear, it starts working again. The Preload runs every 5 minutes. If you want set a specific interval, you should take a look at the Manually Preload with Cron Jobs tutorial.
Note: The preload feature works with the WP Schedule system. Since there will be no action to trigger WP_CRON after the entire cache has been created, you need to set a cron job as you can see in this tutorial.
3. How to Re-order the Content Types?
By default the preload sorts the content types. This works for most users, but sometimes there are situations that requires you to reorder them.
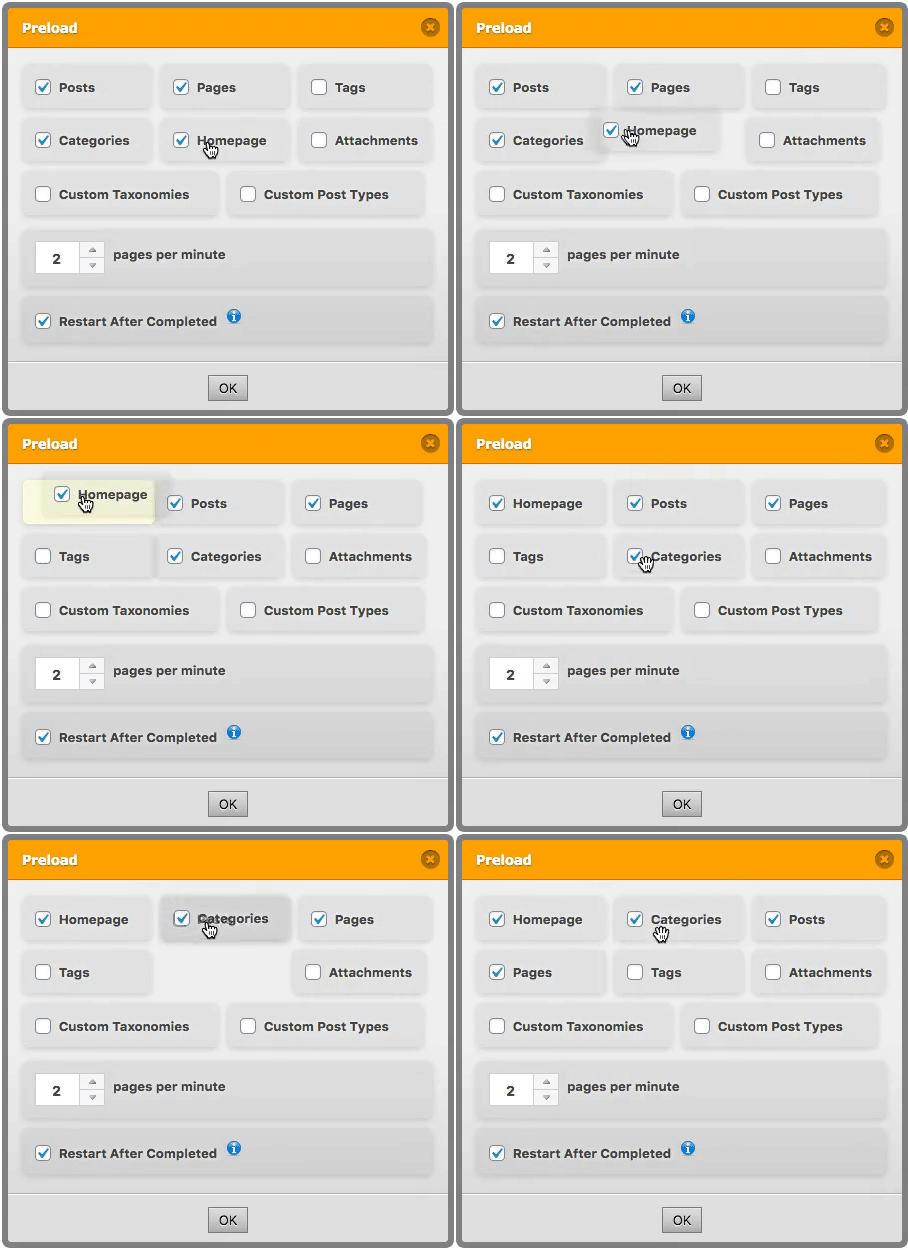
Some parts of your site can get a lot of traffic. In this case, you may want those contents to be cached first. It is possible to achieve this with the new feature. You can re-order the items on the preload wizard. Just drag and drop the item you want. Later You need to save the settings of wp fastest cache.
4. What is the “Number” Option Used For?
It depends on the power of the server. If you have a ordinary hosting package, you should not set more than 4-6. But if you have a VPS, you can set 10-12. You can set the preload number to a maximum of 12 under the Preload settings.
If you want to set the number 12 or more, you need to add the following lines after <?php which exists at the top of wp-config.php file. However, we do not recommend to increase the number more than 12 unless you have a powerful dedicated server.
define('WPFC_PRELOAD_NUMBER', 15);
5. What is the “Restart After Completed” Option Used For?
Cache is created not only with the preload feature, but also when visitors come to a page. If your site gets a lot of traffic, many caches are created concurrently due to visitors opening the pages and this causes a lot of CPU usage.
In this case, instead of clearing the entire cache and creating it all again uncontrollably, creating it in a controlled way in time will help reduce CPU usage a lot. If the option is enabled, the preload creates cache and it overwrites the existing cache file.
If you are using the “Restart Preload After Completed” feature, you should disable the “New Post” option because if the “New Post” option is enabled, the entire cache is cleared when the new post is published and there is no point in using this feature.
Disadvantages of This Feature: Due to the cache being created one by one in time, it may take time for new changes to appear. For example; a newly published article appears only on pages whose cache has been re-created.
Note: The preload feature works with the WP_CRON system. Since there will be no action to trigger WP_CRON after the entire cache has been created, you need to set a cron job as you can see in this tutorial.
6. How to Speed Up Manually?
The Preload feature works with WP Schedule which works when someone visits your WordPress site. If your site doesn’t receive a lot of traffic, WP Schedule may not work properly so you need to add a cronjob which speeds up the preload feature.
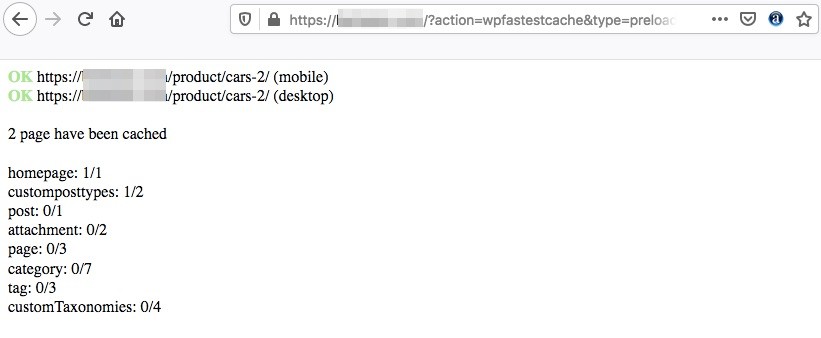
If you call the following url, the preload works manually.
your-site.com/?action=wpfastestcache&type=preload
Cron Job
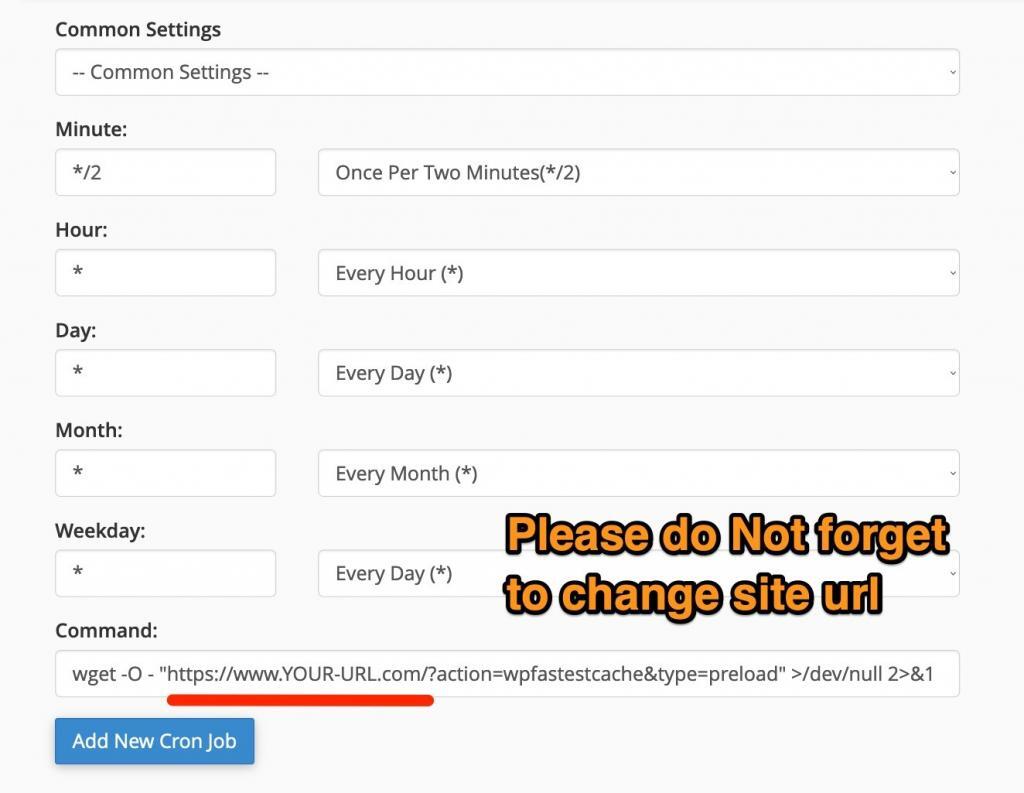
You can set a cron job as below.
wget -O - "https://www.YOUR-URL.com/?action=wpfastestcache&type=preload" >/dev/null 2>&1
Note: The preload option must be enabled.
