
How to Make Audio Sound Muffled
One of the most commonly used audio effects is muffling. It can be used to make audio sound like it’s underwater, to make voice sound like they’re coming through a wall, to make it sound like speakers are far away and much more.
Fortunately, getting that muffled voice effect is very simple – all you have to do is apply a very simple EQ curve and you’ve got it!
What you’re hearing when audio sounds muffled is the removal of the high frequencies in a sound. When you hear sound from a sound source that is in a different room or a long way away the high frequencies are removed because higher frequency waves lose energy more quickly.
In this guide we’re going to take you through the simple voice equalization techniques to get that muffled, or underwater sound.
Removing high frequencies with an EQ
The best tool to use when removing high frequencies with an EQ is a low pass filter. Low pass filters do exactly what they say on the tin – they only let low frequencies through.
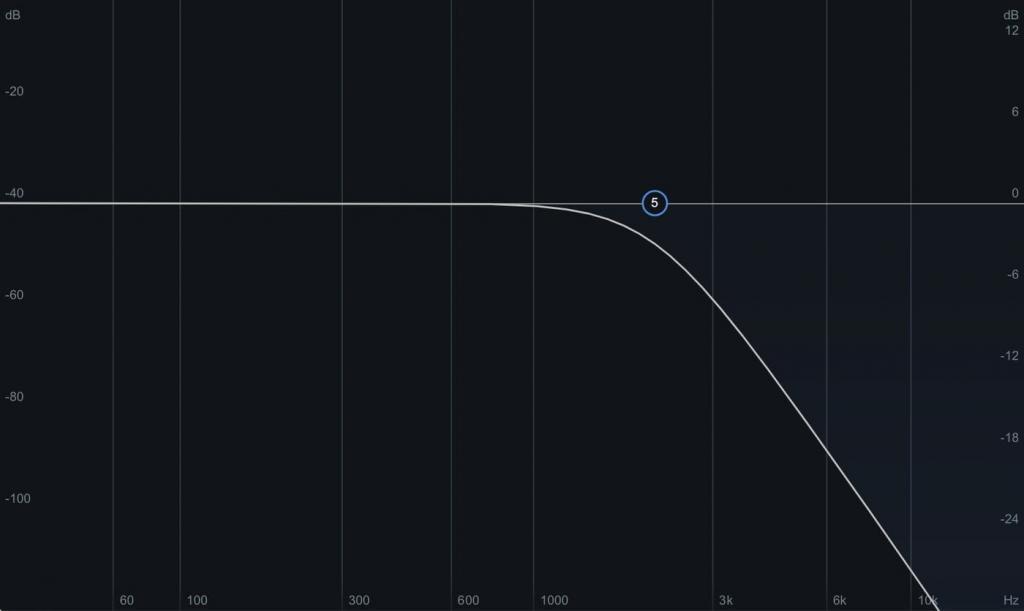
The above image demonstrates what this actually looks like. No frequencies above the where you set the filter will be allowed through.
Immediately you can hear that muffled sound – the speaker could be standing in a different room and all that’s required for this effect is a bit of vocal equalization.
Now let’s look at how we can get this muffled sound with stock audio effects in DaVinci Resolve, Adobe Premiere Pro, Sony Vegas and Final Cut Pro X.
How to muffle audio in DaVinci Resolve
When it comes to audio, DaVinci Resolve is by far the best equipped of the popular video editors. Resolve’s powerful fairlight tab is a dedicated audio workspace which gives you almost as much control as a dedicated DAW (digital audio workstation).
The Resolve audio mixer also has an EQ built right into it so you don’t have to load anything up in order to achieve a muffled voice or muffled music.
Once the audio you want to muffle is loaded into DaVinci Resolve head over to the fairlight tab.
In the mixer section, just above where it says the name of each channel, there is a very small EQ. To open it simply double click. Now you can fine tune your sound with Resolve’s fully functioned, six band EQ.
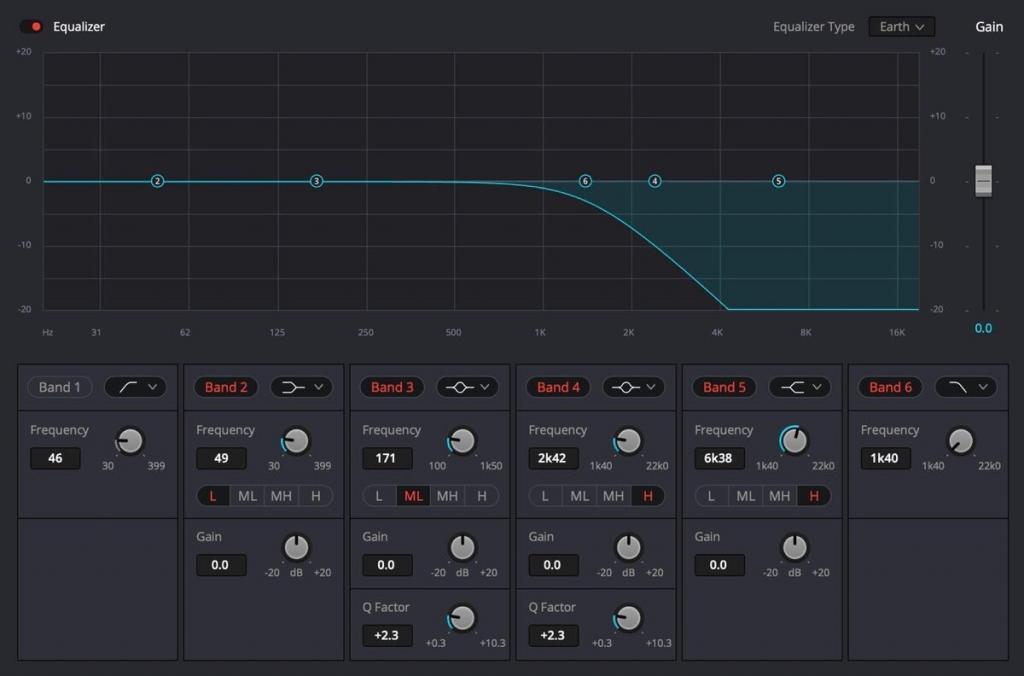
Band 6 is a low pass filter. It is not activated by default when you open the EQ but you can turn it on by clicking on the words ‘Band 6’. Then, simply use the frequency dial to set the value at which the high frequencies will be cut.
You are limited to a maximum cut ove 1040 Hz with Resolve’s low pass filter which is a shame. You can achieve more of a cut by opening the Equalizer Type drop down menu in the top right hand corner of the UI and by selecting the Air option. This gives a slightly more pronounced cut.
How to muffle audio in Premiere Pro
Adobe Premiere audio effects are great, Premiere Pro even has a dedicated lowpass filter effect so you don’t have to fiddle around with EQ bands to make an EQ muffler. You can find the lowpass filter by searching for ‘Lowpass’ in the effects tab. Once you’ve found the Lowpass effect simply drag and drop it onto the audio file you wish to muffle.
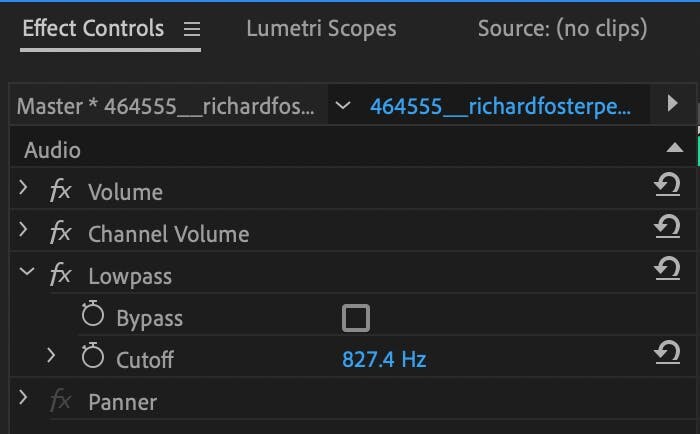
A small, purple ‘Fx’ symbol will appear on your audio clip, click on it to open the Effect Controls window. The lowpass effect is incredibly easy to use, simply drag the cutoff value up and down until you find the setting that gives you the sound you want. Alternatively, if you know a thing or two about the frequency spectrum, you can type in the value that you want to set the cutoff at.
How to muffle audio in Sony Vegas
Sony Vegas has a simple, stock equalizer which can easily be used to get that muffled voice or muffled music sound. It’s called Track EQ and it can be accessed by opening the Track FX window via the track header.
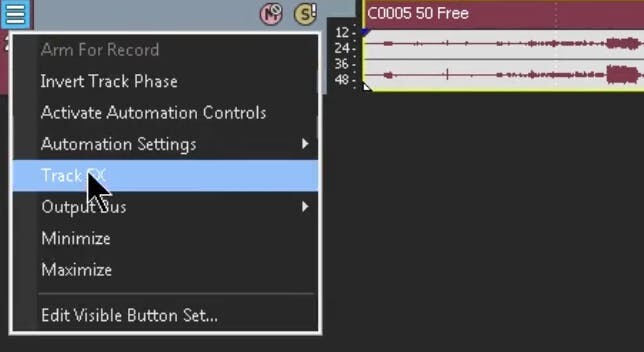
This window makes three audio effects available to you: Track Noise Gate, Track EQ and Track Compressor. Select Track EQ.
How to muffle audio in Final Cut Pro X
Because Final Cut Pro is made by Apple, you get access to all of the powerful audio tools that are included with Logic Pro X, an industry standard DAW! That’s great news for anyone wanting to have powerful audio control in their video editor.
To access the EQ in Final Cut simply click the effects button in the top right hand corner of the timeline – this will give you an effects library which you can search through. To find the in built EQ search for Channel EQ.
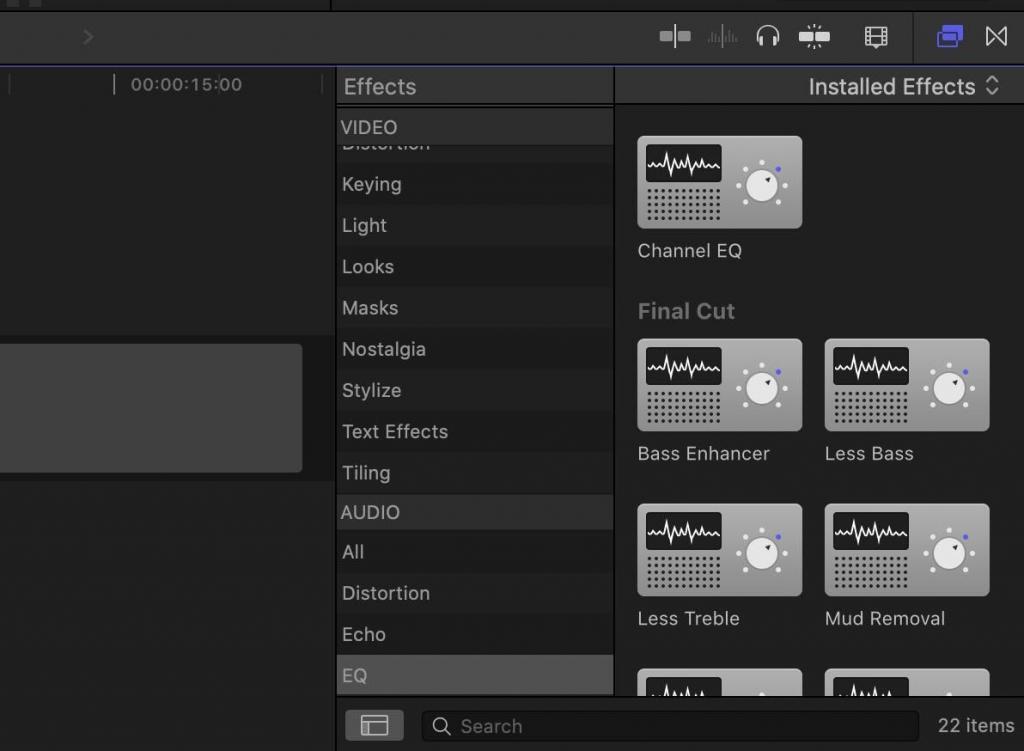
Next drag ‘Channel EQ’ onto the clip you wish to use it on. To adjust the EQ find the Channel EQ in the Audio inspector, here you can adjust each parameter or open the EQs UI for more detailed control. To add a low pass filter open the plugin UI and activate it by clicking the small low pass filter image in the top right hand corner of the interface. Now you can drag the filter to set it at the best sounding position on the frequency spectrum.
